How to improve the layout of a small dental clinic
Maximize Every Square Foot: A Layout Optimization Guide for Small Dental Clinics
As a professional specializing in dental design designer, xiaotie found that for many dentists opening or renovating a small dental clinic, the biggest challenge often isn’t the equipment—it’s the layout. An efficient layout not only enhances the patient experience but directly boosts your workflow efficiency and your practice’s profitability. Here are specific improvement strategies tailored for the U.S. market.
I. Reimagining Patient Flow: From “Maze” to “Guided Stream”
The traditional linear layout (Reception → Waiting → Treatment → Checkout) often creates congestion in compact spaces.
Improvement Strategies:
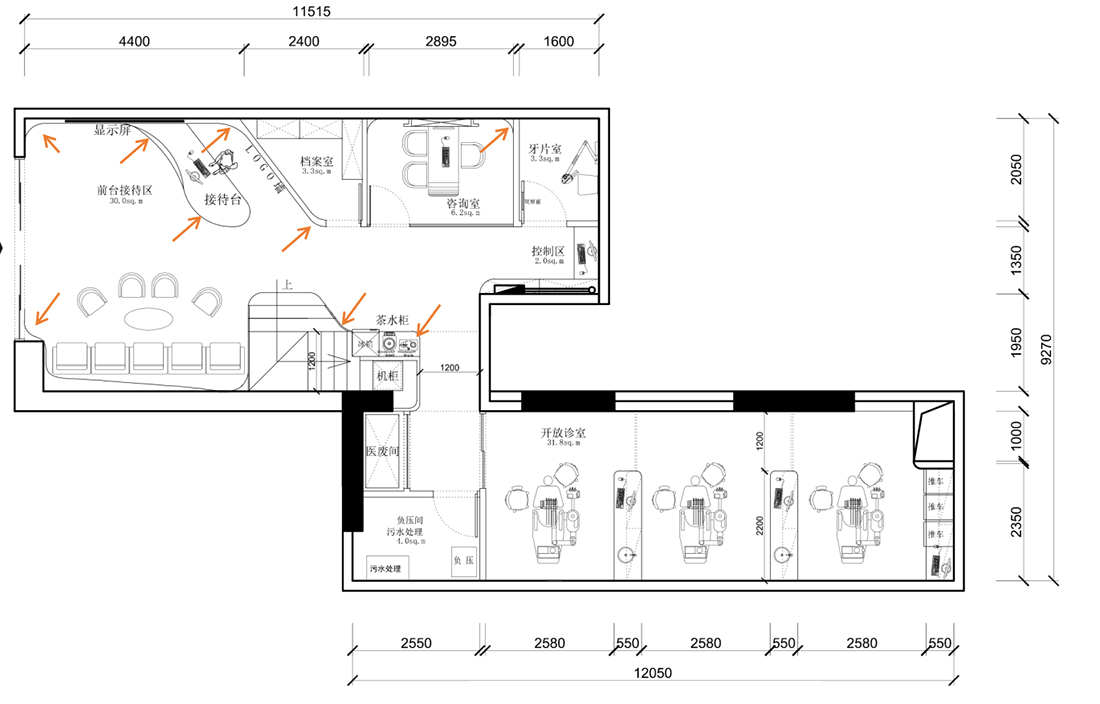
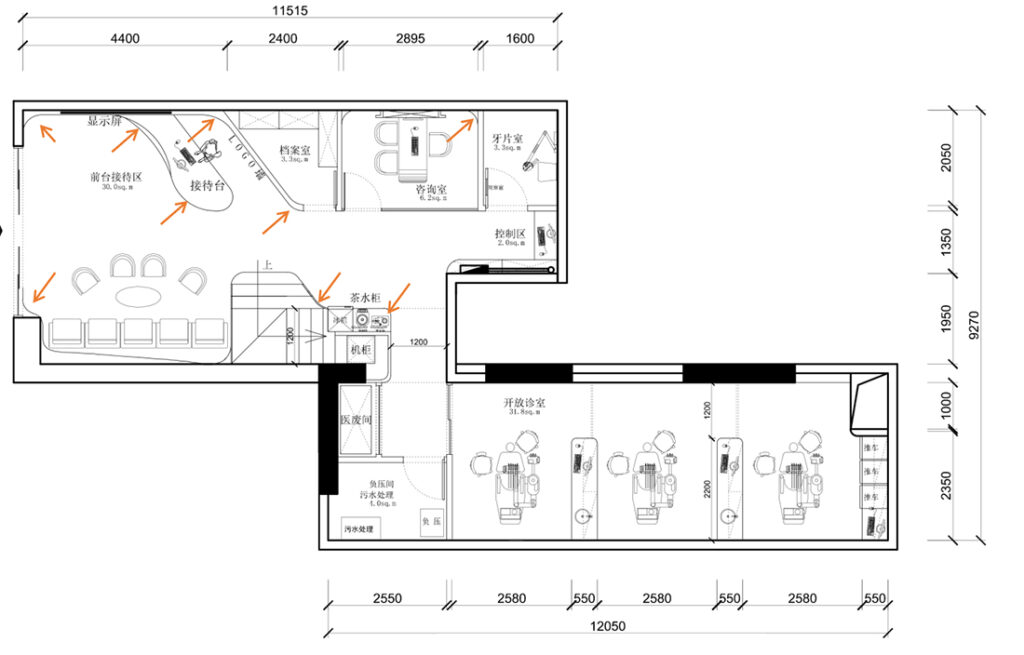
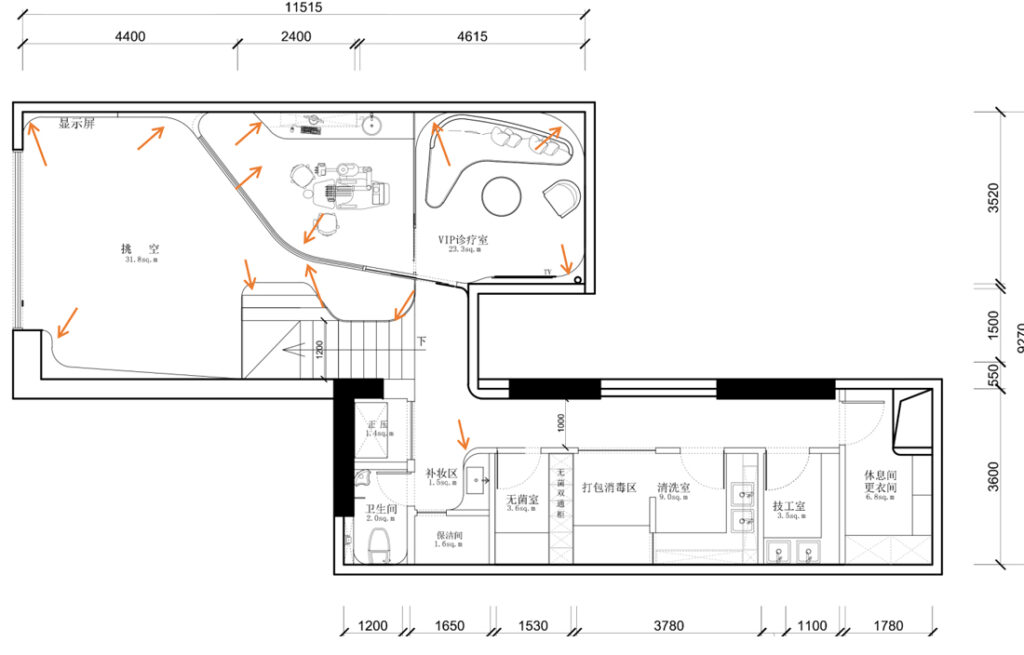
- Create a Clear, Single-Loop Pathway: Design a natural, non-intersecting flow. Ideally, the patient’s journey from the entrance to the reception desk, then to the waiting area, and finally into the treatment room should be as smooth as flowing water, avoiding crossover with departing patients or supply transport.
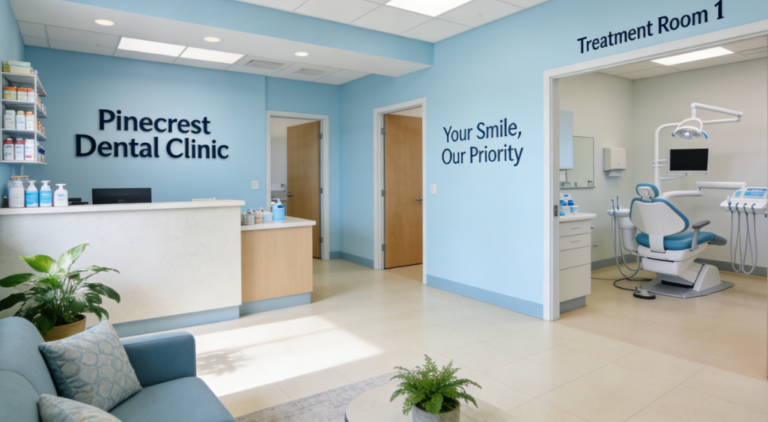
- Position the Reception Desk as the “Command Center”: The receptionist should have an unobstructed view of the entrance, the main part of the waiting area, and the corridor leading to the treatment zone. This enhances both security and attentiveness to patients.
- Example: A small dental clinic in Seattle instantly improved spatial openness and people-flow efficiency by moving its reception desk from directly facing the door to a 45-degree angle and adopting an open, low-profile cabinet design.
II. A Paradigm Shift in Treatment Room Layout: From “Room” to “Efficient Workstation”
For clinics with limited space, every treatment room’s design must be meticulously crafted.
Dental clinic design scheme upgrade:
- Adopt a “Front-Stage/Back-Stage” Separation Concept:
- Front-Stage (Patient Zone): Keep it clean, quiet, and serene. Conceal all plumbing, most instruments, and storage within cabinets or to the side. Create a visual “sanctuary” for the patient, free from the sight of cluttered equipment.
- Back-Stage (Doctor/Assistant Zone): Out of the patient’s direct sightline, design an ergonomic “work triangle” (dentist-assistant-equipment) ensuring all frequently used instruments and materials are within arm’s reach.
- Embrace Open or Semi-Open Concepts:
- For small dental clinics, consider using sturdy glass partitions or half-walls to divide treatment areas. This fosters a sense of openness, facilitates team collaboration (e.g., quick instrument passing), and maintains patient privacy through frosted glass or clever angling.
III. Multi-Functional Zones: One Room, Multiple Uses, Maximum Efficiency
When square footage is limited, giving spaces multiple functions is key.
- Combine the Consultation Room with Staff Break/Office Area: Utilize movable partitions or folding door systems. The space can serve as a new patient consultation and case discussion room in the morning, then transform into a staff lunch or office area in the afternoon.
- Creative Use of Corridors: Widen a section of the corridor and embed display cases (for oral care products or educational models) into the wall, transforming it into a “Health Education Gallery.”
IV. Invisible Integration of Technology and Storage
Tangled wires and misplaced supplies are the enemies of an efficient layout.
- “Invisible” Tech Integration: Within the dental design solution, plan for ample conduit chases. Mount computer screens on articulating arms or conceal them behind cabinet doors. Keep countertops clear, reserving them only for essential treatment equipment.
- Vertical Storage Systems: Utilize full-height cabinets from floor to ceiling. Store low-frequency-use items up high and high-frequency items at mid-level. Consider designing shallow storage on the back of treatment room doors or narrow side walls for daily supplies.
V. Experience-Driven Transformation of the Waiting Area
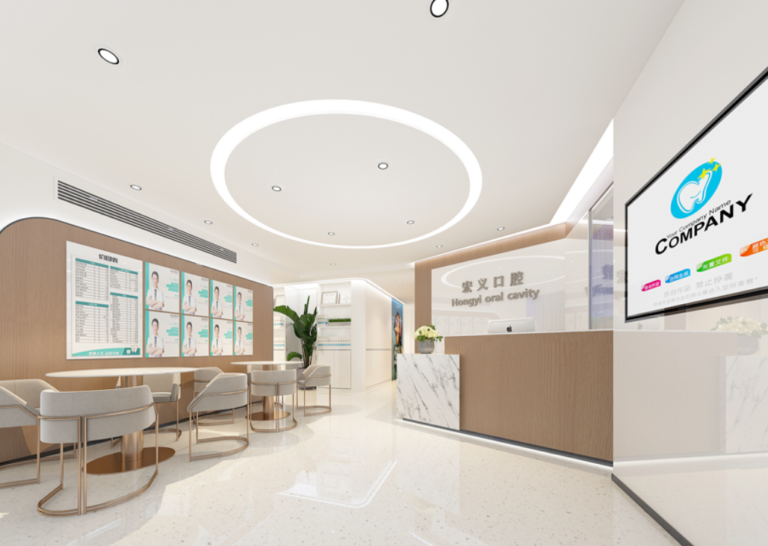
The waiting area shouldn’t just be a space for “waiting”; it should be the beginning of the experience.
- Reduce Physical Footprint, Enhance Experience Quality: Instead of placing 10 seats that often remain empty, thoughtfully arrange 4-6 exceptionally comfortable seats, complemented by a small coffee bar, charging ports, and fast Wi-Fi. This reduces crowding and communicates a sense of quality.
- Establish a Quick Checkup/Hygiene Area: If space permits, set up an open or semi-enclosed “quick-check corner” near the front desk, equipped with a basic dental chair and simple equipment. It can be used for brief follow-ups, suture removal, or simple consultations, diverting pressure from the main treatment rooms.
Conclusion: Layout is Strategy
Optimizing the layout of a small dental clinic is far more than simple furniture rearrangement. It is a systematic dental design solution that requires comprehensive consideration of:
- Patient Psychology (reducing anxiety, enhancing the sense of control)
- Operational Ergonomics (optimizing team workflow)
- Spatial Economics (maximizing the value of every square foot)
The return on a professional layout optimization is immediate: reduced patient wait times, higher daily patient capacity, lower staff fatigue, and ultimately, powerful word-of-mouth—because patients can intuitively feel the significant difference between a meticulously designed, patient-centered clinic and an ordinary one.
Investing in thoughtful layout design is an investment in the smooth operation and sustainable growth of your practice for years to come.
You May Also Like
modern dental clinic design ideas
Dental clinic renovation: why do we need professional designers